Enter a Refund that has been Issued
1. Go to the Fees Tab on the Case Form.
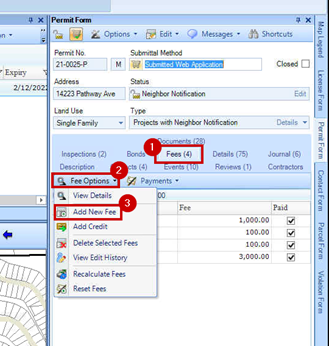
2. Select the Fee Options Menu.
3. Click on Add New Fee. (Note: In this example we are showing how to perform a refund with a negative fee amount. This can also be done using the Add Credit option if you need to distribute the fee across multiple accounts. See Move a Payment from one Item to Another.)
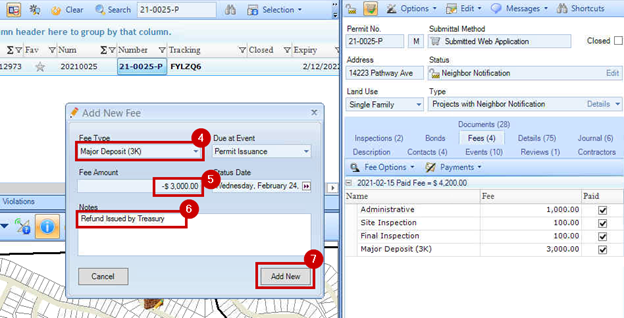
4. Choose the Fee Type you are trying to Refund – this should be the same fee type as one of the paid fees.
5. Enter the amount you want to refund as a negative value.
6. Add any notes about the refund or its reason.
7. Click the Add New button.
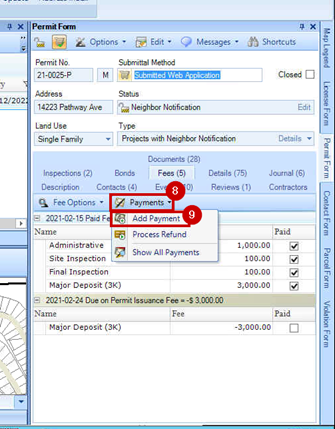
8. Now that your negative fee appears on the Fees Tab, select the Payments Menu from the toolbar.
9. Click on Add Payment. (Note: In this example we are showing how to perform a refund with a negative fee amount. This can also be done using the "Process Refund" because a negative payment is essentially a refund. See Move a Payment from one Item to Another)
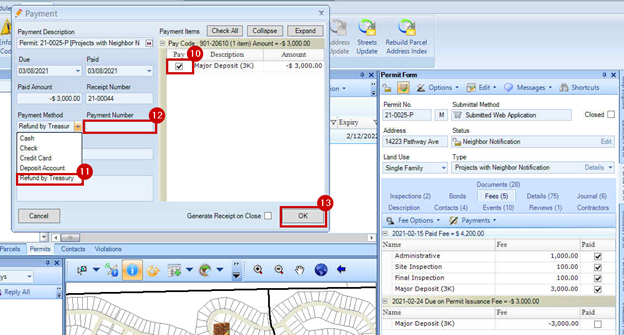
10. Check the box to select the Fee.
11. Choose the Payment that your organization designates for refunds.
12. Enter a payment number such as a check number issued by the finance department or leave this field blank.
13. Click OK.
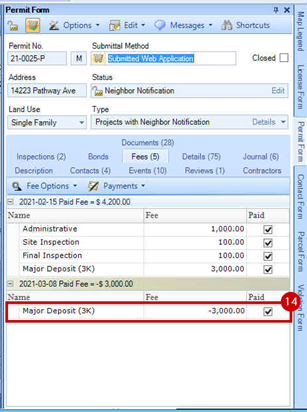
14. You will now see the refunded negative payment show up on the Fees Tab.